2026 年,AI 开发工具已经从"锦上添花"进化为"不可或缺"。无论你是后端工程师、前端开发者,还是 AI 产品经理,选对工具组合都能让效率提升数倍。 本文从 AI 编程助手、Agent 开发框架、提示词工程工具、模型 API 平台 和 部署与监控 五大维度,梳理当前最主流、最实用的 AI 开发工
让 AI 帮你写博客,自动推送到博客系统——从生成内容到发布上线,全程只需要几句自然语言指令。这不是科幻,而是一条已经跑通的实际工作流。 这篇文章记录了我如何用 OpenClaw(开源 AI Agent 平台)+ Halo(开源博客系统)+ Halo CLI(官方命令行工具)搭建一条完整的 AI 博
前言 首先问一个问题:为什么那么多人说AI很强,而你使用下来感觉AI输出的内容还是有所欠缺? 其实很多人都不会使用AI,即使他已经用了很久了,但是没有掌握使用的技巧,不算是真正会用。 其实,想要用好AI就一个核心原则,把自己的问题说清楚! 就跟向其他人提问一样,你需要让AI知道你在干什么,发生了什么
每个人使用 AI 的方式都在不断进化,简单记录一下从简单对话到复杂 Agent 系统的完整演进路径。 前言 ChatGPT 在 2022 年底横空出世,大语言模型(LLM)彻底改变了我们和计算机打交道的方式。但很多人没意识到,我们使用 AI 的方式本身也在经历一场变革。 这篇文章带你回顾 AI 使用
Koog 是 JetBrains 开源的 LLM 集成框架,专为 JVM 和 Kotlin 开发者设计,支持模块化功能和 Kotlin Multiplatform,本文介绍了其基本使用方法,包括环境配置、依赖添加和调用示例。
rust 数据类型 Rust 基础数据类型有以下这几大类: 整数型 整数型简称整型,按照比特位长度和有无符号分为以下种类: 位长度 有符号 无符号 8-bit i8 u8 16-bit i16 u16 32-bit i32 u35 64-bit i64 u64 128-bit i128 u128
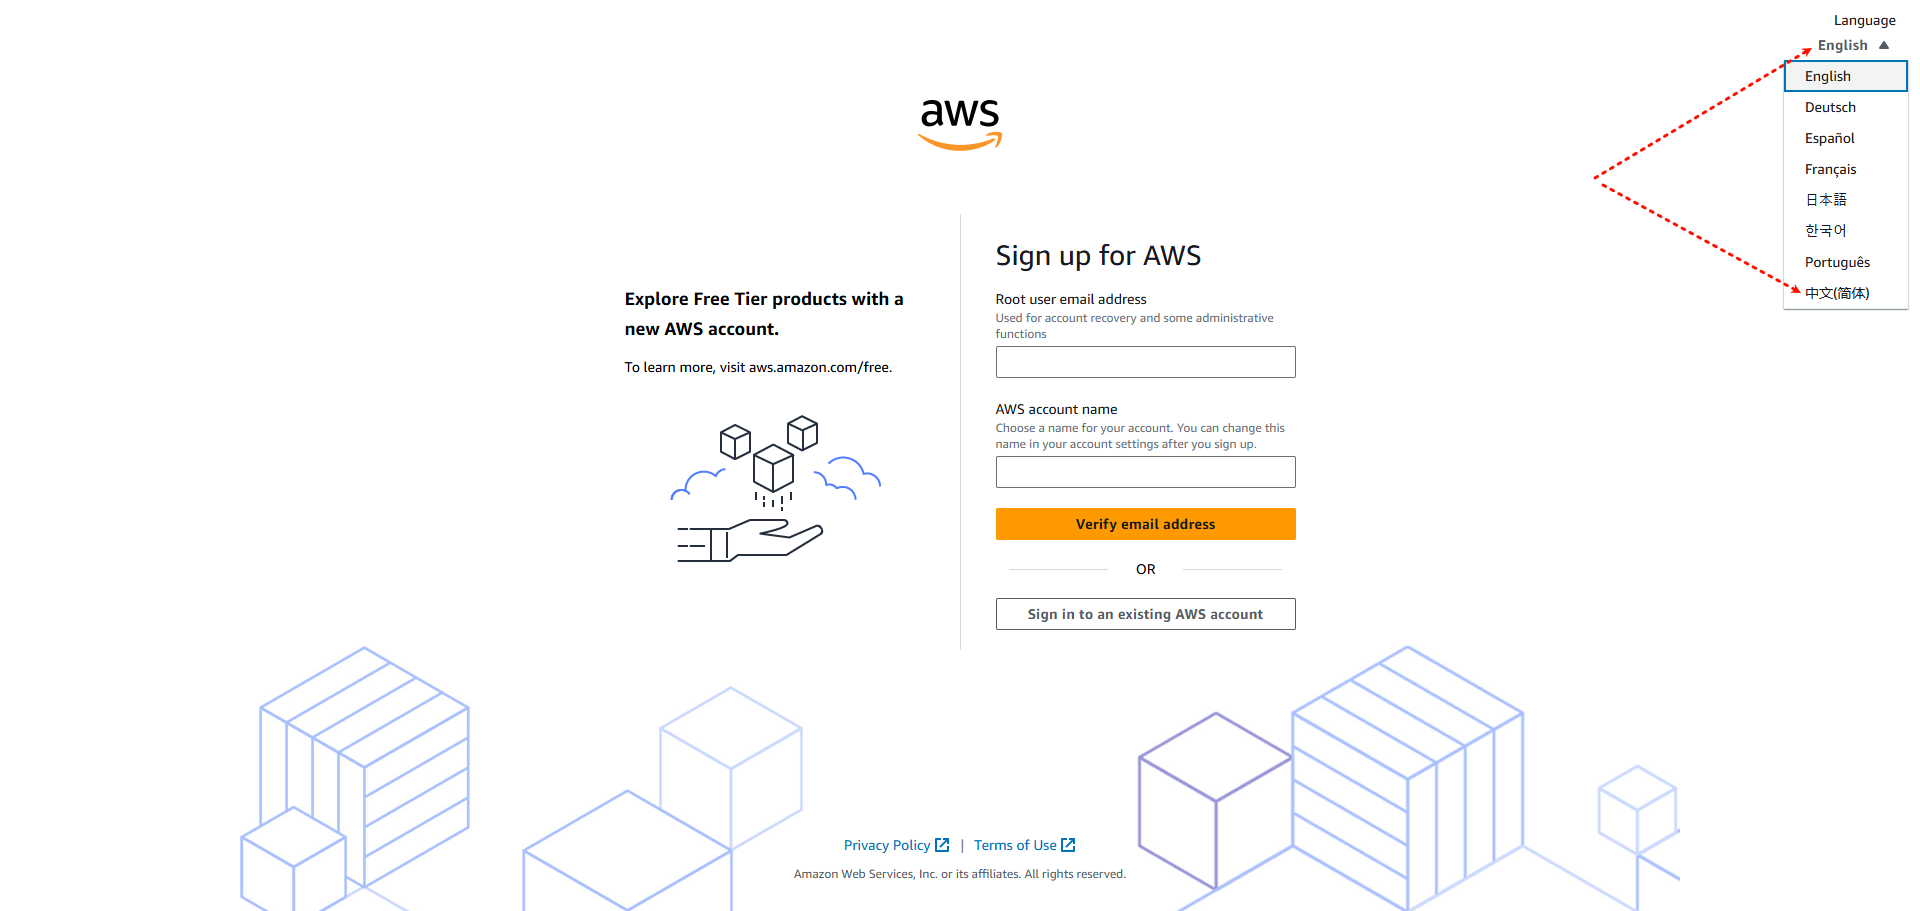
一、为什么选择亚马逊云科技免费服务器? 作为刚入门的新手,你是否遇到过这些困扰: ❌ 想部署网站却要支付高昂服务器费用 ❌ 复杂的服务器配置劝退萌新 ❌ 想学习服务器部署,却苦于没有环境 亚马逊云科技的12个月免费套餐完美解决这些问题!我亲测可用性堪比付费服务,特别适合: 🎓 在校学生练手项目
一键安装命令 大家好!今天我来分享一个快速安装 docker-compose 的方法。以下是我常用的命令,当前版本是 V2.32.4。如果你需要最新版本,可以查看获取docker compose最新版本号 部分,获取最新版本号后替换命令中的版本号即可。 wget -O /usr/bin/docker
软路由系统 iStoreOS 中部署 Minecraft 服务器 前言 本文将介绍如何在软路由系统 iStoreOS 中通过 Docker 部署 Minecraft 服务器。此方法同样适用于其他支持 Docker 的系统,以及运行 Java 程序的场景。值得一提的是,本方案同样兼容 OpenWrt
AI
游戏
生活
技术